Preparing Phoenix developer environment
As a mechanic needs his tools, so web developers need theirs. To begin working in Phoenix, we need to install and configure some dependencies beforehand. First of all, Erlang VM and Elixir on which the framework runs, you can learn how to install them here. Phoenix also requires a database. We’ll choose Postgres, as the framework comes with an adapter for it and due to it’s huge popularity. With that said, let’s get down to it.
This article tries to guide on how to install and run a Phoenix app for the first time.
Contents
Setting up Postgres
We’ll use Docker to containerize our Postgres database, you can read up on Docker installation and basic commands here. To get the database running we have to download an image first. Start your terminal, Docker Desktop and type in docker search command to see a list of available images.
docker search postgresLet’s select the one marked as official and pull it.
docker pull postgres
The beauty of using an image (instead of installing an app locally) lies in the fact that it comes ready to use out of the box. All we have to do is execute the docker run command with a couple of environmental variables. The -p flag binds the container port 5432 to 5433 on the host. The database inside the container will be accessed via 5432, but if we’ll want to connect from the outside, we’ll have to use 5433.
docker run -d -ti -e POSTGRES_USER=db_client -e POSTGRES_PASSWORD=my_secret_password --name postgres -p 5433:5432 postgres
We can test our container with psql, a terminal-based client for Postgres. If we type psql in our terminal, it will tell us the installation command.
sudo apt-get install postgresql-client-common
We can now connect to our database with psql using exec. Adding a -U flag lets us set the username for the client, without it, it defaults to root, that would cause an error, as we created the database with a different username.
docker exec -ti postgres psql -U db_clientAnother way is to use psql by providing a postgres adress. Since we published port 5432 on 5433 we’ll now have to use it in the connection uri.
psql postgres://db_client:my_secret_password@localhost:5433/postgres
When you connect, you should see username followed by an equal sign and a hashtag. You can display help by inputing \?, scroll the file with page_up and page_down keys and quit by pressing ‘q’ on your keyboard. To disconnect just type in exit or \q. Great, our DB is up and runnning, let’s move up to another step.
Getting the Phoenix app generator
Phoenix ships with an generator, you can easily scaffold a base project, api routes, liveview files, migrations, and much more. The generator requires Elixir 1.14 and Erlang 24 or later, let’s check active elixir version with -v command.
elixir -v
If you don’t meet the requirements, check how to install any Elixir and Erlang versions here. We’re going to use mix, Elixir build tool, to install the generator from hex, the Elixir package manager.
mix archive.install hex phx_newWhen the installation completes, we’re ready to generate our first app. Before that, be sure to check out the help file and skim it.
mix help phx.newGenerating and setting up our first app
As mentioned earlier, the generator’s help file lists a bunch of options and hints on how to create an app. For our introductory app, we won’t use much of them. Go to your home directory, create a new folder projects, cd into it and generate my_app. Wait untill the app is created, then fetch and install the deps.
cd ~/
mkdir projects
cd projects
mix phx new my_app
Before we’ll start our app we need to configure the database credentials. Open up an IDE (I’d recommend VSCode as it is fairly easy to learn) or a text editor of your choice (for now even nano or notepad will do). To open the entire project with VSCode, cd into my_app and use code command.
cd my_app/
code .
Now open the dev.exs file located in config folder and locate these lines:
# Configure your database
    config :my_app, MyApp.Repo,
    username: "postgres",
    password: "postgres",
    hostname: "localhost",
    database: "my_app_dev",
    stacktrace: true,
    show_sensitive_data_on_connection_error: true,
    poll_size: 10
And change the credentials to those you entered when you spun up the Postgres container (if you don’t remember them, you can use the docker inspect container_name command and locate the Env entry for a quick reminder).
# Configure your database
    config :my_app, MyApp.Repo,
    username: "db_client",
    password: "my_secret_password",
    hostname: "localhost",
    database: "my_app_dev",
    port: 5433,
    stacktrace: true,
    show_sensitive_data_on_connection_error: true,
    poll_size: 10
Very nice, time to install inotify-tools package, the framework uses it for live code reloading.
sudo apt update
sudo apt install inotify-tools
Cool, with this done, only one step remains before we spin up our app, that is, generate the database. Phoenix ships with Ecto, a library that performs tasks on and interacts with databases. With a DB created we’re ready to start our application, the simples way to do that is with mix phx.server command but we’ll modify it so we can have access to iex(Elixir terminal).
mix ecto.create
mix iex -S mix phx.server
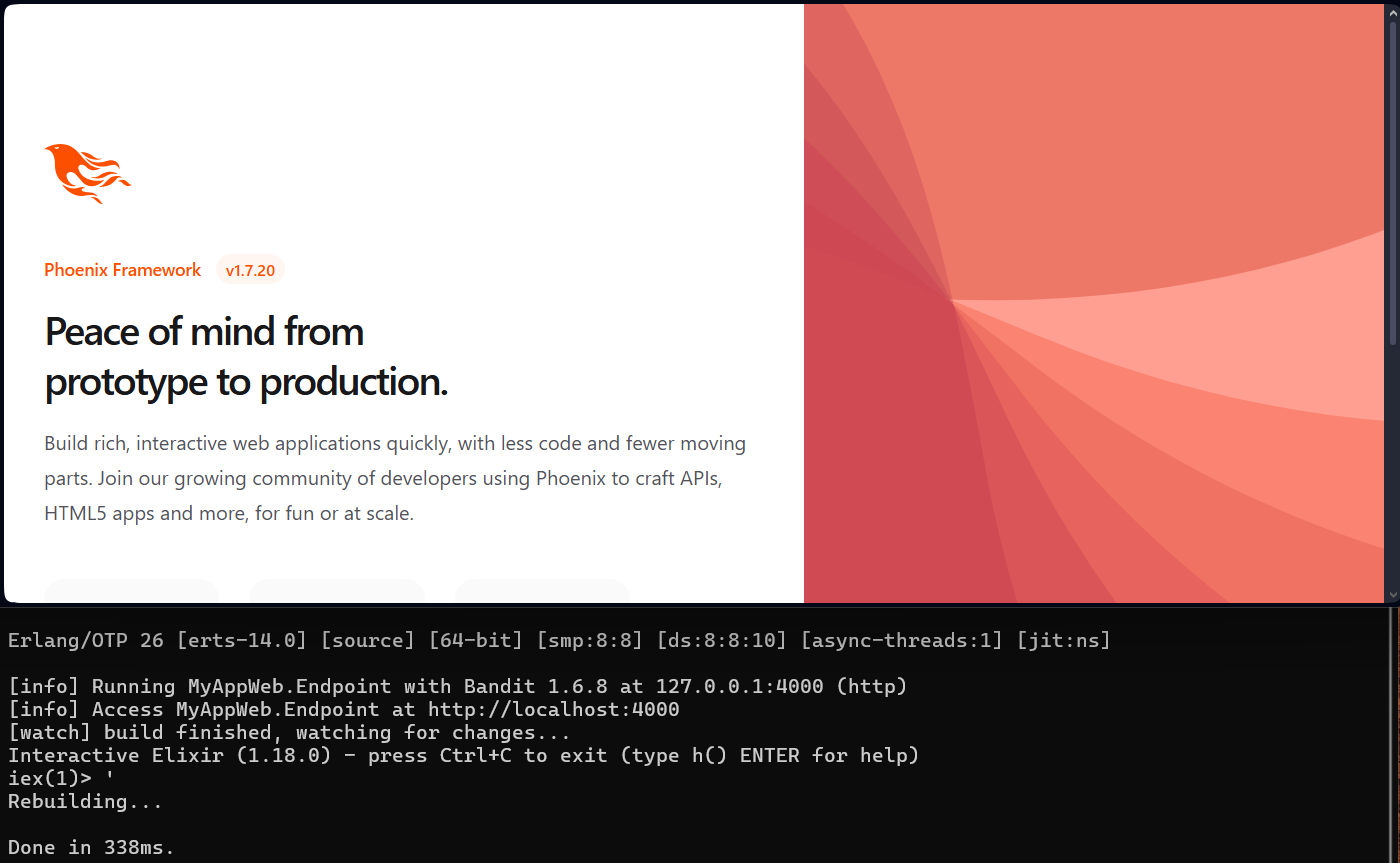
Now when we visit localhost:4000 we’ll see the default Phoenix view generated with phx.new.
Now it’s all in your hands, get acknowledged with naming convention, explore the files, folder structure or even do something more bolder and use generators to quickly build an API or a liveview app. Hope you enjoyed this short guide, I remember I struggled a lot at first with such a trivial task as setting up an application. See you in the next one.